
A proxy manager is an essential tool for managing and routing web traffic through proxies, ensuring efficient and secure connections. Installing one inside a Docker container is an excellent choice for developers and system administrators who seek portability, scalability, and ease of maintenance. This guide will walk you through setting up a proxy manager inside Docker, complete with a minimal folder structure for storing your docker-compose file and related configurations.
1. Why Use Docker for Proxy Management?
Docker simplifies application deployment by packaging software and its dependencies into a container. For a proxy manager, this means easier installation, consistent environments across deployments, and seamless scaling. Moreover, running a proxy manager in Docker ensures isolation from the host system, reducing potential conflicts with other software.
2. Preparing Your Environment
Before setting up a proxy manager in Docker, ensure you have Docker and Docker Compose installed on your system. For most Linux-based systems, this can be done with the following commands:
sudo apt update
sudo apt install docker.io docker-compose
After installation, verify the versions with:
docker --version
docker-compose --version
3. Folder Structure for Docker Setup
To keep your Docker projects organized, create a dedicated folder structure. For example, set up a directory called proxy-manager-docker with the following structure:
proxy-manager-docker/
├── docker-compose.yml
├── config/
│   └── app.conf
└── data/docker-compose.yml: Contains the configuration for Docker Compose to orchestrate the container.config/: Stores application-specific configuration files.data/: Used for persistent storage like logs or databases.
This structure ensures that all files are neatly organized and easily accessible.
4. Create network
docker network create nginx-proxy-network5. Writing the docker-compose.yml File
The docker-compose.yml file is the heart of your Docker setup. Here’s a minimal example for setting up a proxy manager:
services:
  app:
    image: 'jc21/nginx-proxy-manager:latest'  # Replace 'latest' with the specific version
    restart: unless-stopped
    container_name: proxy-manager-app
    ports:
      - '8020:80'    # Public HTTP Port
      - '8021:443'  # Public HTTPS Port
      - '8022:81'    # Admin Web Port
      # Add any other Stream port you want to expose
      # - '21:21' # FTP
    environment:
      DB_MYSQL_HOST: "db"
      DB_MYSQL_PORT: 3306
      DB_MYSQL_USER: "npm"
      DB_MYSQL_PASSWORD: "npm"
      DB_MYSQL_NAME: "npm"
      PUID: 1000
      PGID: 1000
    volumes:
      - ./data:/data
      - ./letsencrypt:/etc/letsencrypt
    depends_on:
      - db
    networks:
      - nginx-proxy-network
    healthcheck:
      test: ["CMD", "curl", "-f", "http://app:81"]
      interval: 10s
      timeout: 3s

  db:
    image: 'jc21/mariadb-aria:latest'  # Replace 'latest' with the specific version
    container_name: proxy-manager-db
    restart: unless-stopped
    environment:
      MYSQL_ROOT_PASSWORD: 'npm'
      MYSQL_DATABASE: 'npm'
      MYSQL_USER: 'npm'
      MYSQL_PASSWORD: 'npm'
      MARIADB_AUTO_UPGRADE: '1'
    volumes:
      - ./mysql:/var/lib/mysql
    networks:
      - nginx-proxy-network
    healthcheck:
      test: ["CMD", "mysqladmin", "ping", "-h", "db", "-u", "npm", "-pnpm"]
      interval: 10s
      timeout: 3s

networks:
  nginx-proxy-network:
    external: true
This configuration pulls the latest Nginx Proxy Manager image, maps required ports, and mounts the config and data directories for persistent storage.
6. Deploying the Proxy Manager
Navigate to the folder containing the docker-compose.yml file:
cd /path/to/proxy-manager-dockerRun the following command to deploy the container:
docker-compose up -dThe -d flag runs the container in detached mode. Use docker ps to verify that the container is running.
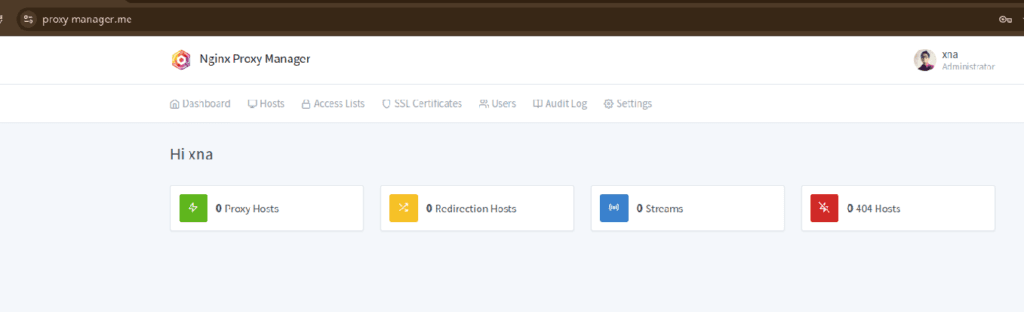
7. Accessing the Proxy Manager
Once the container is running, access the Proxy Manager’s web interface by navigating to http://localhost:8081 in a browser. By default, the login credentials are:
- Username: admin@example.com
- Password: changeme
Be sure to update these credentials after your first login for security purposes.
8. Customizing Configuration
You can customize the proxy manager’s behavior by editing the files in the config directory. For example, modify app.conf to adjust Nginx settings. After making changes, restart the container:
docker-compose restartThis ensures your changes are applied without disrupting the entire system.
9. Maintaining the Proxy Manager
Routine maintenance, such as updates and backups, is straightforward with Docker. To update the container, pull the latest image:
docker-compose pull
docker-compose up -d
For backups, simply copy the config and data directories to a secure location. This ensures you can restore the setup quickly if needed.
Setting up domain (optional)
server {
    listen 80;
    server_name proxy-manager.me;
    return 301 https://$host$request_uri;
}

server {
    listen 443 ssl;
    server_name proxy-manager.me;

    ssl_certificate /home/xna/Documents/ssl-local/cert.pem;
    ssl_certificate_key /home/xna/Documents/ssl-local/key.pem;

    location / {
        proxy_set_header X-NginX-Proxy true;
        proxy_set_header X-Real-IP $remote_addr;
        proxy_set_header X-Forwarded-Proto $scheme;
        proxy_set_header X-Forwarded-Port $server_port;
        proxy_redirect off;

        # WebSocket support
        proxy_http_version 1.1;
        proxy_set_header Upgrade $http_upgrade;
        proxy_set_header Connection $connection_upgrade;
        proxy_pass http://127.0.0.1:8022/;
        proxy_set_header Host $http_host;
        proxy_cache_bypass $http_upgrade;

        gzip off;
    }

    error_log  /var/log/nginx/proxy_man_error.log;
    access_log /var/log/nginx/proxy_man_access.log;
}
![]()